Is it possible to update the stock firmware after a root?
A clear yes and no. What doesn't work is an OTA update. System updates are simply not possible via OTA, since we have a rooted, custom system. But there is a way to update the phone without losing data. What you need is a rooted Galaxy S8 Exynos SMG950F mobile, a PC and the original charging cable.
Disadvantages of this procedure:
- Samsung Pay and similar software for KNOX do not work even after the update.
- You could block your phone (usually not a big deal as long as you have a backup available)
- You may lose your data in your internal storage! Do a backup !!!
- Please only follow this procedure if you are using a Galaxy Samsung S8 Exynos G950F. It will probably work with an S8 + as well, but I haven't tested.
Step by step instructions:
/*
 * Your warranty is now void.
 *
 * I am not responsible for bricked devices, dead SD cards,
 * thermonuclear war, or you getting fired because the alarm app failed. Please
 * do some research if you have any concerns about rooting and messing up working systems
 * before flashing it! YOU are choosing to make these modifications, and if
 * you point the finger at me for messing up your device, I will laugh at you.
 *
*/- Unlock your phone. Since your mobile should already be unlocked, as it is rooted, see the steps below as a check.
- Required software: none
- Have a backup ready if something goes wrong. You can use Samsung Smart Switch, or even better, a nadroid backup. Ok, I've said it 3 times now. If you want to continue without proper backup, don't blame me.
- Open the phone settings
- Scroll down and open Phone Info
- Open software information
- Tap the Build Number option seven times
- Now you are a developer 😏
- Return to the main level of phone settings, scroll down and open developer options
- Check and/or activate the OEM unlock
- Congratulations. The boot loader is unlocked and your phone is most likely still working. 😏
- Download the latest firmware: SamMobile and extract it into a directory. After unpacking delete the file CSC *. *
Important: do not download outdated software. From Oreo on, only versions of the same age or newer can be installed. In older versions, the radio network is usually not available after installation. So if there is a message after the up (down)- grade "Insert simcard" or similar, you have probably installed an outdated firmware. So it's best to choose the latest version. The easiest way to get the latest information is with the Samsung Phone Info app. In the example you can see the current version DTC6.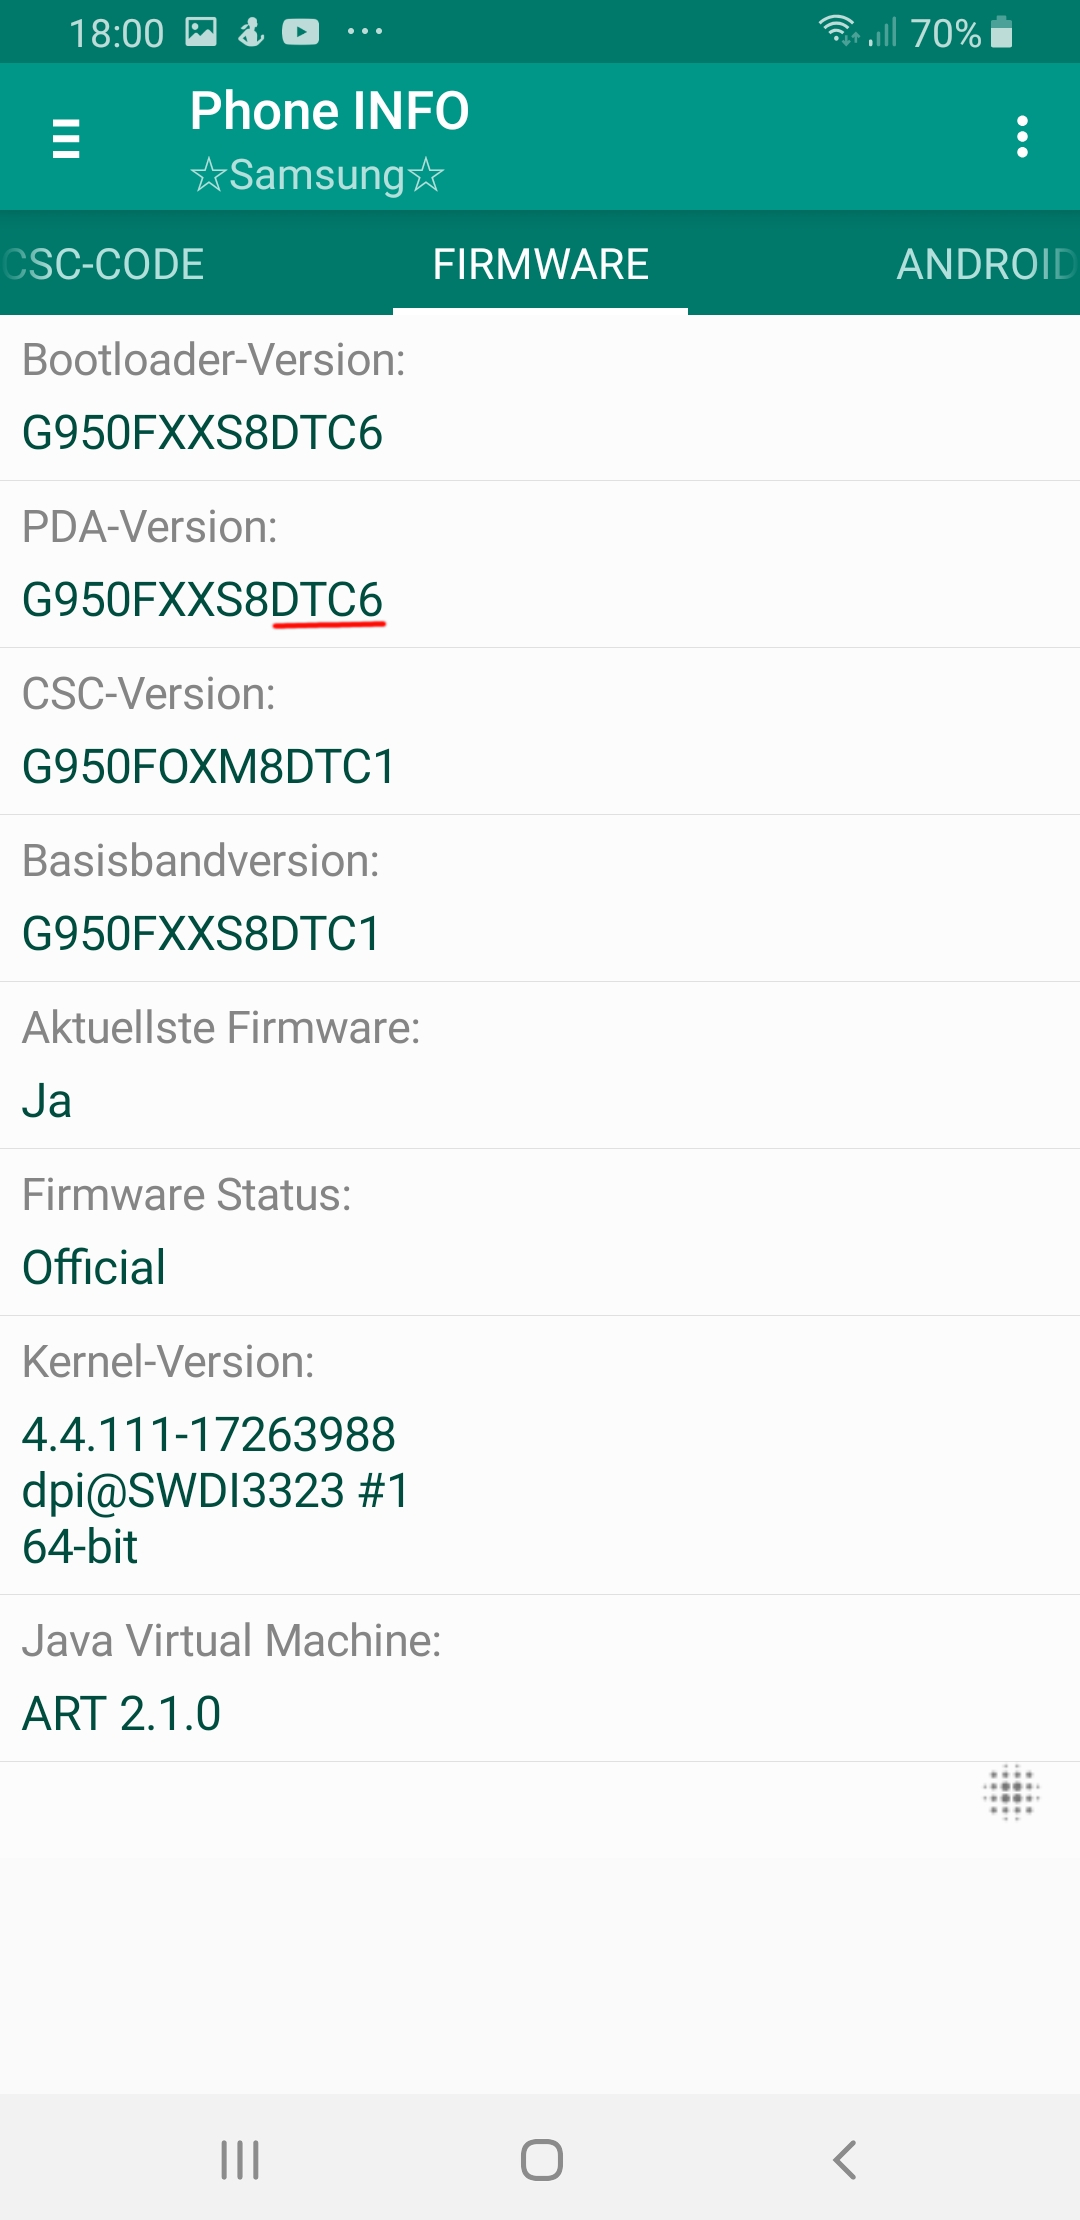
Also choose the right country code. Otherwise it may be that your mobile is blocked for about 2 weeks. You can find the country code once in the Settings - Telephone info - Software information - Provider software version or also with the above app. In this example PHE for Spain: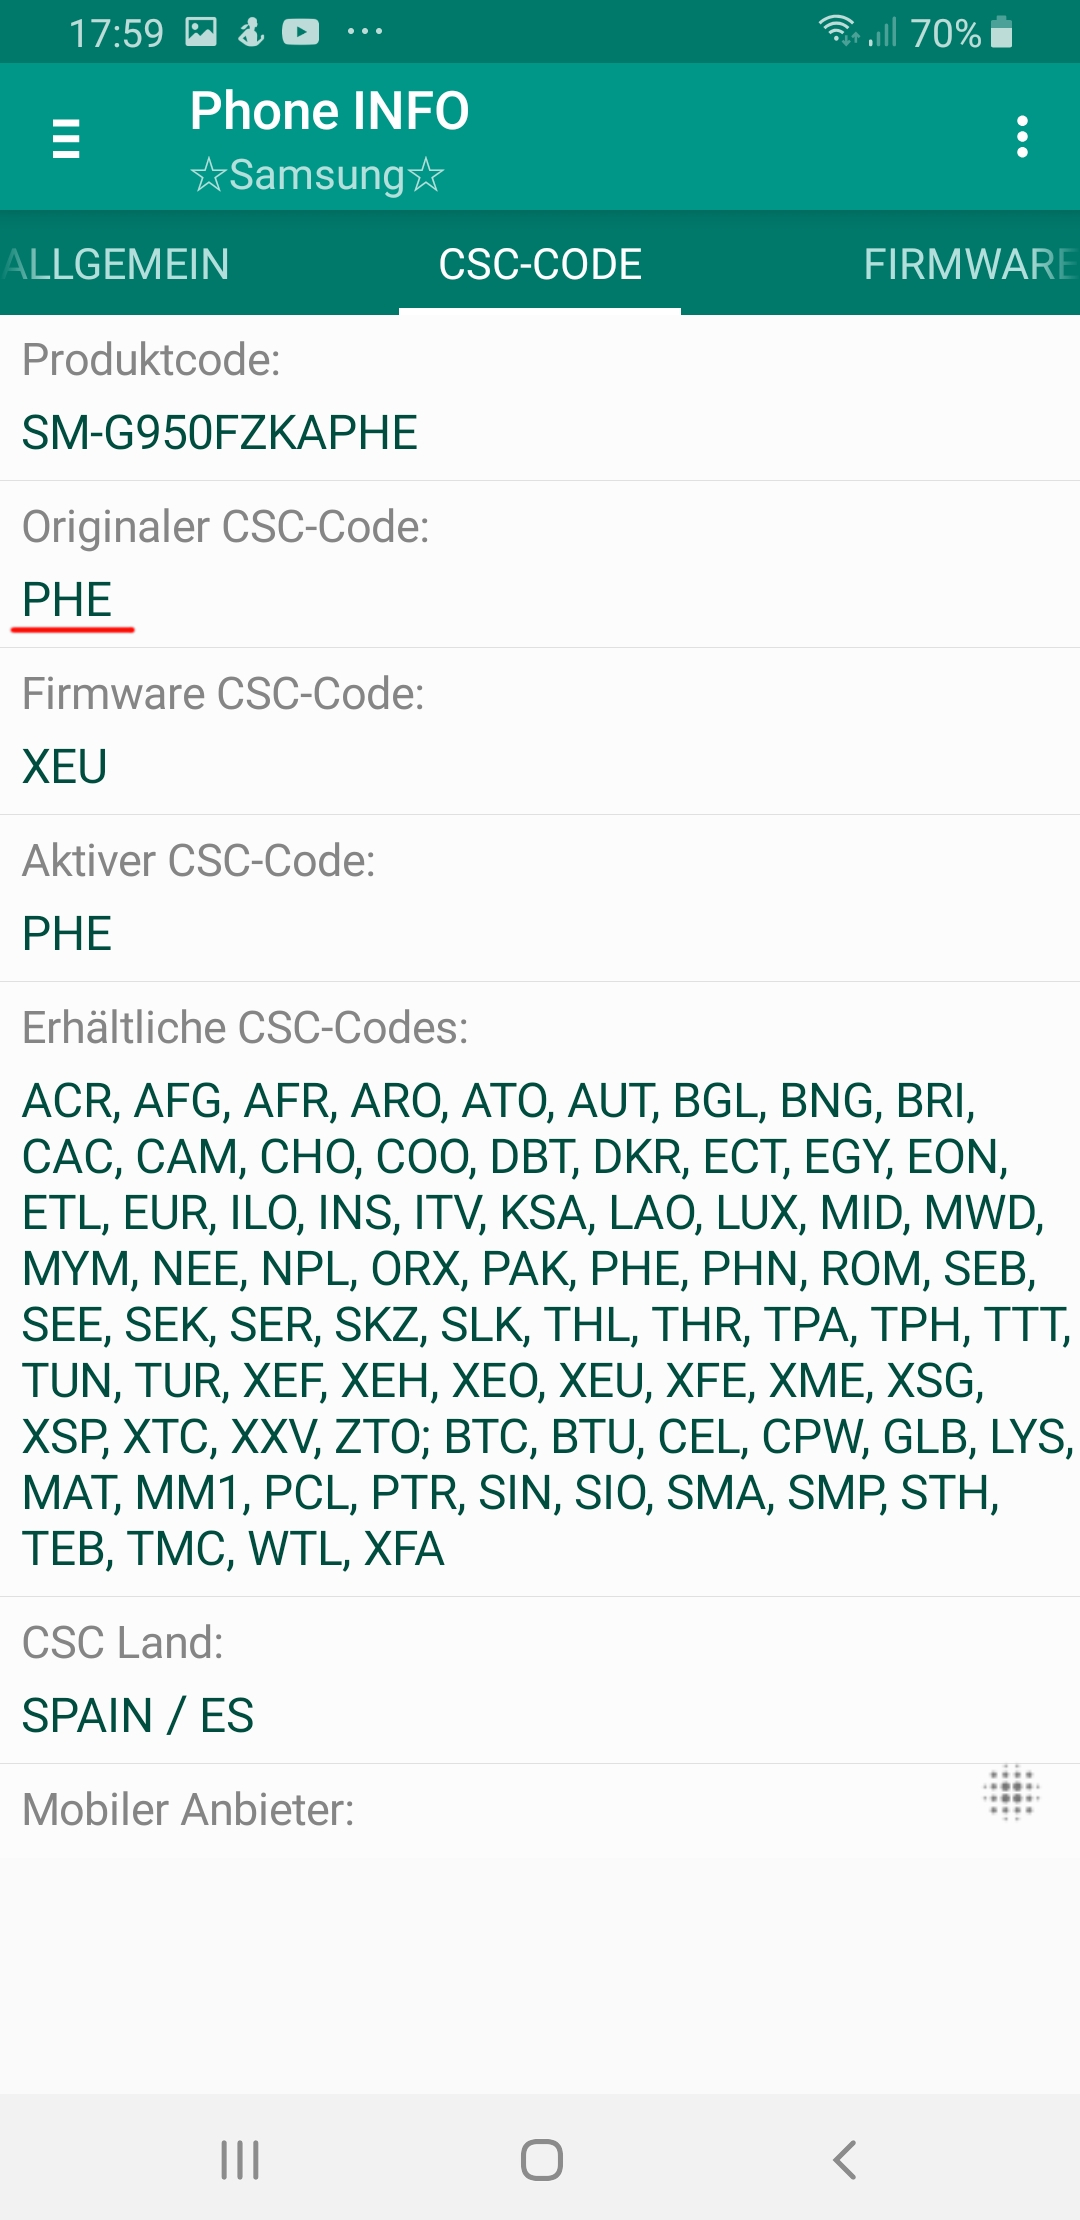
- Remove all login security such as pin code, fingerprints, iris scan etc. If not, you may not be able to log in at the end of this process.
- Download the latest version of TWRP for your phone (* .img.tar - do not unzip): TWRP
- Install the latest Samsung USB drivers: Samsung Developers
- Download and unzip ODIN: Github
- Download the latest Magisk version (don't unzip) and store on your external SD card: Github
- Shut down your phone
- After shutting down, press and hold these buttons simultaneously: BIXBY-VOLUME DOWN-POWER until a blue screen appears, asking if you want to switch to download mode.
- If you continue now, the device warranty will be lost !!!
- Press VOLUME UP to continue
- Open ODIN - ODIN does not have to be installed. Simply run the EXE file in the folder where you extracted the ODIN * ZIP file
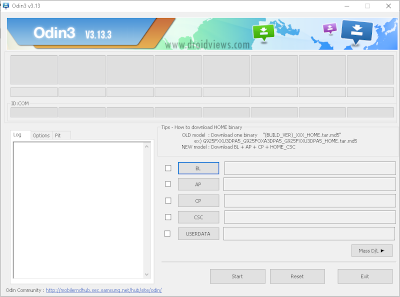
- Connect your phone to the PC using the original cable. ODIN should be able to display the connection.
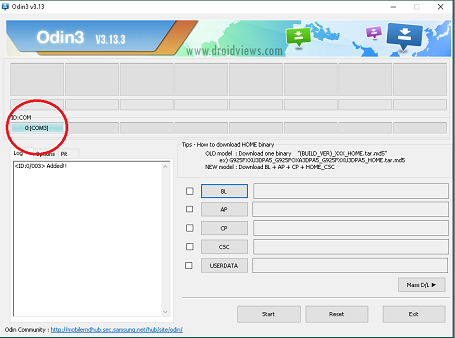
- Insert the extracted firmware files in the respective order. BL *. * To BL, AP *. * To AP, CP *. * To CP, HOME_CSC *. * To CSC. AP and CSC take a little longer, so don't lose your patience. Disable the Auto Restart option in the tab options. DO NOT CHANGE OTHER OPTIONS !!
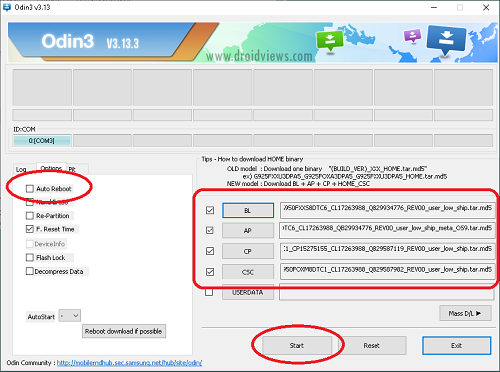 Select the Start button. Don't lose patience now. Never disconnect the cable or close the window until all files have been transferred and the process is completed.
 - After ODIN has completed the installation, hold down the VOLUME DOWN-POWER key combination on your phone until the phone restarts. There is a blue screen with the Android robot. After about 1-2 minutes the screen shows "Erasing". ATTENTION: Now it's time to be careful. Immediately afterwards, the cell phone restarts automatically. If you miss this moment, everything was in vain, the data area is encrypted and you can set up the phone again. As soon as the phone switches off to restart, hold the key combination BIXBY-VOLUME DOWN-POWER in order to get back into the download mode.
- As soon as the mobile phone has connected to Odin again, the downloaded file twrp * .img.tar is inserted in AP and the checkmark for BL, CP and CSC is removed. Activate the Auto Restart option in the tab options. DO NOT CHANGE OTHER OPTIONS
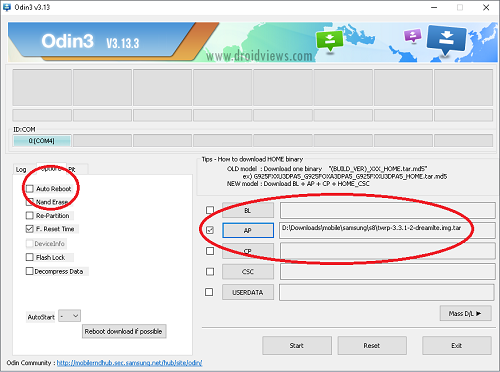
- Click the Start button
- Immediately hold the key combination BIXBY-VOLUME UP-POWER. It shouldn't take long for the phone to restart and the TWRP splash screen to appear.
- Once you are in TWRP recovery, press INSTALL - SELECT STORAGE - select the external SD card and the downloaded magisk * .zip file
- Swipe to start the installation process
- Restart the system after completion: REBOOT - SYSTEM. The boot process may now take a few minutes. That's it, done. Your phone has TWRP again and your data should still be available.
- Start the Magisk Manager app. If it indicates Magisk is NOT installed, go to recovery again (restart and BIXBY-VOLUME UP-POWER) and install Magisk again. Done, that's it.
- If you end up in a boot loop or the phone doesn't restart, your data will likely be gone. You can try to start the process again. If nothing works then install a fresh Samsung firmware (e.g. with a Smart Switch) and then reinstall Root. If not your system should work properly now. It is a good idea to make a first Nandroid backup of the updated system. Restart the phone and go into recovery mode by pressing the combination BIXBY-VOLUME UP-POWER. Once in TWRP press the backup option.


Comments powered by CComment