")
")


Why rooting a mobile?
Because it is better. A lot of software available for standard computers is not possible to install because you are just on the user level. Imagine you would be using Ubuntu or Windows and would'nt have the administrator level. With root you may install system relevant software, read system data out of your phone, read logs, install adaway, firewalls or other tools or even install a complete custom firmware.
Disadvantages:
- Samsung Pay and similar software related on KNOX might not be working anymore
- You are loosing your warranty
- You might brick your phone (usually not a big deal as long as you have a backup available)
- You are going to loose ALL your data on your internal memory! HAVE A BACKUP AVAILABLE!
Please follow this procedure only if you are using a Galaxy Samsung S8 Exynos G950F
Step by Step Instructions:
/*
 * Your warranty is now void.
 *
 * I am not responsible for bricked devices, dead SD cards,
 * thermonuclear war, or you getting fired because the alarm app failed. Please
 * do some research if you have any concerns about rooting and messing up working systems
 * before flashing it! YOU are choosing to make these modifications, and if
 * you point the finger at me for messing up your device, I will laugh at you.
 *
 */
-
Unlock your phone
- Required software: none
- Have a backup available if something is going wrong - You may use Samsung Smart Switch as Nandroid backups are not available unless your phone is not rooted. Ok, I said it now 3 times. If you still want to continue without a proper backup, do not blame me.
- Open your phone settings
- Scroll down to and open About phone
- Open Software Information
- Tap 7 times on the option Build number
- Now you are Developer 😏
- Head back to to main level of Phone settings, scroll down and open Developer Options
- Enable OEM unlocking
- Congratulations. Your bootloader is unlocked and your phone most probably is still working. 😏
- Install TWRP and Magisk - IMPORTANT: Save TWRP and ODIN on your PC, Magisk and no-verity-opt-encrypt.zip on your phones external sd card
- Remove any slogin security features like PINCode, biometrical login or whatever. Possibly you may not login later if you don't do so.
- Download latest version of TWRP for your phone: Download TWRP
- Install latest Samsung USB Drivers Download Samsung Developers
- Download and unzip ODIN Download Github
- Download latest Magisk version: Download on Github
- Download no-verity-opt-encrypt.zip: https://build.nethunter.com/android-tools/no-verity-opt-encrypt/no-verity-opt-encrypt-6.1.zip
- Shutdown your phone
- After shutdown hold these buttoms on the same time: BIXBY-VOLUME DOWN-POWER until you see a blue screen asking you if you want to enter the download mode
- If you continue now, your warranty is lost!!!
- Push VOLUME UP to continue
- Open ODIN - you do not have to install it, just run the .exe file in the folder where you extracted the ODIN *.zip file
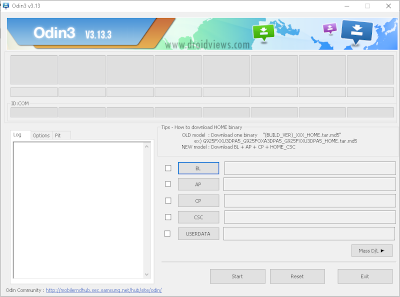
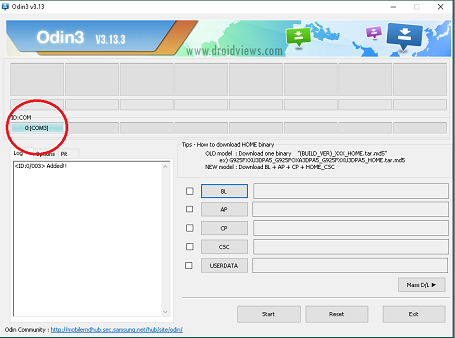
- Connect your phone with the original wire to your PC. ODIN should be able to show the connection.
- Add the twrp*.img.tar file you downloaded under AP
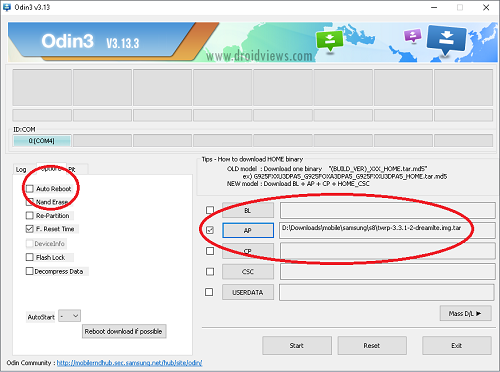 In the tab options untick Auto Reboot. DO NOT CHANGE ANY OTHER OPTIONS!!
 - Press the start button. It should not take long. If you've forgotten to untick the Auto Reboot Option prepare yourself. As soon as the phone starts rebooting you need to press and hold the BIXBY-VOLUME UP-POWER combination on the same time until you see the TWRP welcome screen.
- After ODIN completed the installation hold and press VOLUME DOWN-POWER on your phone until the screen is getting black. Now switch directly to BIXBY-BIXBY-VOLUME UP-POWER combination on the same time until you see the TWRP welcome screen.
- In the unlikely event the system is booting up normally restart here.
- Once you are in TWRP Push WIPE - FORMAT DATA and confirm with YES.
- Now all your data is gone, I hope you did a backup.
- Goto REBOOT - RECOVERY
- Once you are back in TWRP recovery push INSTALL - SELECT STORAGE - choose the external SD-card and select the downloaded no-verity-opt-encrypt.zip
- Push Add more zips - Select the magisk*.zip file you downloaded
- Swipe to confirm flash
- Reboot to system after completition. That's it, Done. Your phone is rooted.
- If you end up in al boot loop or your phone is not restarting anymore, you need to unbrick your phone. If not, you may complete the setup process and restore your backup of your internal card. One you finnished it is a good idea to create your first nandroid back. Reboot and enter the recovery mode by holding down BIXBY-VOLUME UP-POWER combination. Once in TWRP press backup option.
Comments powered by CComment